
Saw angle guides are essential tools for woodworkers, enabling precise angled cuts with circular saws, table saws, and drills․
They dramatically improve accuracy, especially when crafting projects requiring consistent, repeatable angles like frames or joinery․
What is a Saw Angle Guide?
A saw angle guide is a tool designed to assist woodworkers in achieving accurate and consistent angled cuts․ These guides come in various forms, ranging from simple miter boxes for basic 45 and 90-degree angles to more sophisticated track saw squares like the Insta-RailSquare and TSO products․ They function by providing a reference point or track for the saw blade, ensuring it remains aligned with the desired cutting angle throughout the entire cut․
Essentially, a saw angle guide minimizes the risk of blade drift and human error, resulting in cleaner, more precise results․ They are particularly useful when working with power tools like circular saws (skill saws) and table saws, where maintaining a straight line at an angle can be challenging without assistance․ Different guides cater to different saw types and cutting needs, offering versatility for various woodworking projects․
Why Use a Saw Angle Guide?
Employing a saw angle guide significantly enhances the precision and quality of angled cuts in woodworking projects․ Without a guide, maintaining a consistent angle with a circular or table saw can be difficult, leading to inaccuracies and wasted material․ Guides minimize blade drift, a common issue where the blade subtly deviates from the intended cutting line, especially during longer cuts․
Furthermore, they improve repeatability, crucial for projects requiring multiple identical angled pieces, like picture frames or trim․ Using a guide also promotes safety by providing greater control over the saw, reducing the risk of kickback or accidental slips․ Whether you’re a seasoned professional or a DIY enthusiast, a saw angle guide streamlines the process and delivers professional-looking results, saving time and frustration․

Types of Saw Angle Guides
Saw angle guides come in diverse forms, including miter boxes, track saw squares (like Insta-RailSquare and TSO), table saw indicators, and specialized drill guide angle guides․
Miter Boxes for Basic Angles
Miter boxes represent a foundational approach to achieving accurate angled cuts, particularly for 45- and 90-degree angles․ These simple yet effective tools consist of a guide with pre-cut slots, directing a hand saw along a precise path․ They are incredibly user-friendly, making them ideal for beginners or quick, straightforward projects․

While miter boxes excel at common angles, their limitations lie in handling more complex or custom angles․ The fixed slots restrict versatility․ Furthermore, the length of the cut is constrained by the box’s size, making them less suitable for wider boards․ Despite these drawbacks, a miter box remains a cost-effective and reliable solution for basic angled cuts, offering a tangible improvement over freehand sawing․

Track Saw Squares (Insta-RailSquare, TSO)
Track saw squares, like the Insta-RailSquare and those from TSO Products, represent a significant advancement in achieving precise angled cuts with track saws․ These tools attach directly to the track, providing a reliable 90-degree reference point for consistently square or angled cuts․ They eliminate the need for cumbersome measuring and marking, streamlining the process and minimizing errors․
Users report high accuracy with these squares, with some noting that TSO squares paired with Makita track saws deliver “dead on” results․ They are particularly valuable for larger sheet goods where maintaining a straight line is crucial․ While an investment, track saw squares offer a substantial upgrade in precision and efficiency for serious woodworkers, simplifying complex cuts and ensuring professional-quality results․
Table Saw Angle Guides & Indicators
Table saw angle guides and indicators are critical for achieving accurate miter cuts and angled crosscuts․ These tools help woodworkers precisely set the table saw’s blade to the desired angle, eliminating guesswork and ensuring consistent results․ Indicators allow for quick and repeatable angle settings, particularly useful for frequently used angles in projects․
The process typically involves locking the turntable angle, then adjusting the saw table using a locking knob while referencing the angle indicator․ This method ensures the blade is positioned correctly for the intended cut․ Accurate setup is paramount; these guides transform a table saw into a precision instrument capable of complex angled joinery, enhancing both efficiency and the quality of woodworking projects․
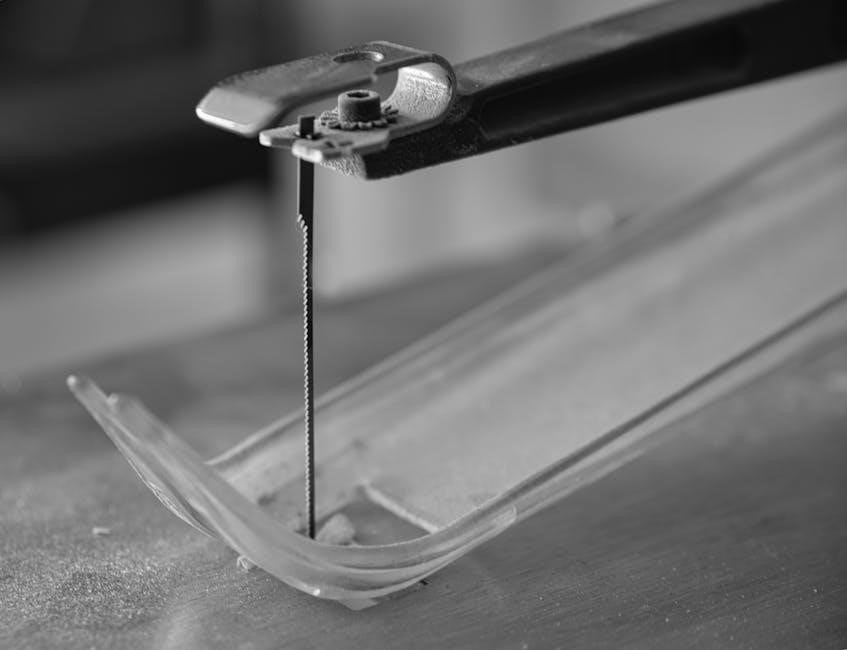
Drill Guide Angle Guides
Drill guide angle guides offer a precise solution for creating angled holes with both drill presses and hand drills․ Unlike standard drilling, these guides maintain a consistent angle throughout the drilling process, crucial for projects demanding accuracy like furniture construction or intricate woodworking details․ They typically feature adjustable angle settings, allowing for a wide range of inclinations․
These guides are particularly valuable when creating mortises, dowel joints, or any application requiring angled entry points․ Utilizing a drill guide minimizes the risk of blade wandering and ensures clean, accurate holes․ Proper clamping and secure attachment of the guide to the workpiece are essential for optimal performance and safety, resulting in professional-quality angled drilling․

Using a Saw Angle Guide: Techniques

Effective techniques involve precise setup, maintaining a stable body position, and utilizing straight edges like 2x4s for consistent, accurate angled cuts with your saw․
Setting Up for Accurate Angle Cuts
Achieving accuracy begins with meticulous setup․ First, firmly secure your saw angle guide to the workpiece, ensuring it doesn’t shift during the cut․ Double-check the angle setting against your project plans; even a slight deviation can ruin the result․
For table saws, utilize the saw angle indicator and locking mechanisms to precisely set the desired horizontal angle, verifying it before each cut․ With track saws, align the guide rail square carefully, confirming its perpendicularity to the blade․
When using a miter box, ensure the saw blade is seated correctly within the slots․ Remember to always test the setup with a scrap piece of wood before committing to the final cut, validating the angle and making any necessary adjustments․
Maintaining Body Position for Straight Cuts
Consistent body positioning is paramount for accurate angled cuts, especially with handheld saws․ Keep your elbows tucked close to your body; this minimizes unwanted blade drift and promotes a stable cutting motion․ Avoid extending your arms, as this introduces leverage that can easily lead to inaccuracies․
Maintain a balanced stance with your feet shoulder-width apart, providing a solid foundation․ Focus your gaze on the cutting line, not the blade itself, to guide the saw smoothly․ Resist the natural tendency to push the saw too hard; let the blade do the work at a controlled pace․
Remember, a stable body translates to a straighter, more precise cut, maximizing the effectiveness of your saw angle guide․
Utilizing a 2×4 as a Straight Edge Guide
When a marked line proves insufficient for a straight cut, a 2×4 becomes an invaluable temporary guide․ Securely clamp the 2×4 alongside your intended cutting line, ensuring it’s perfectly aligned․ This provides a physical reference for your saw baseplate, preventing deviations and ensuring a square or angled cut․
The 2×4’s width offers ample contact for guiding the saw, particularly useful for longer cuts․ Double-check the clamping pressure – too loose, and the guide shifts; too tight, and it might distort․
This simple technique is especially effective when using circular saws, offering a cost-effective solution for achieving accurate cuts without specialized equipment, complementing your saw angle guide․

Popular Saw Angle Guide Brands
TSO Products, Benchdogs UK, and Makita are highly regarded brands offering reliable and precise saw angle guides and systems for woodworkers․
TSO Products: Reliability and Precision
TSO Products has established a strong reputation within the woodworking community for delivering exceptionally reliable and precise saw angle guides․ Many users confidently attest to the accuracy of their squares, like the TSO square paired with a Makita track saw, reporting “dead on” performance․
Their Insta-RailSquare Track Saw Square is a popular choice, designed to enhance the capabilities of track saws for accurate crosscuts․ Woodworkers appreciate the build quality and the consistent results achieved with TSO tools․ The brand is frequently recommended, with users stating they “wouldn’t hesitate to buy it,” highlighting a high level of trust in the product’s performance and durability․ TSO focuses on providing solutions that simplify angled cutting and improve overall project quality․
Benchdogs UK Rail Square: Alternatives
The Benchdogs UK Rail Square presents a compelling alternative to other saw angle guide systems, particularly for track saw users seeking expanded functionality․ When considering wider crosscuts or angle guides beyond standard options, Benchdogs emerges as a frequently discussed choice alongside brands like TSO Products․
Woodworkers exploring alternatives often compare its features and price point, seeking a balance between precision and value․ While TSO enjoys strong recommendations, Benchdogs offers a different approach to achieving accurate angled cuts․ It’s often considered by those already invested in track saw systems, aiming to improve their cutting capabilities for more complex projects․ The Rail Square aims to provide a robust and reliable solution for demanding woodworking tasks․
Makita Track Saw Systems
Makita track saw systems are renowned for their precision and efficiency, often serving as a foundation for advanced cutting setups․ When paired with appropriate saw angle guides, like the TSO square, Makita track saws deliver exceptionally accurate results․ Users report that the combination is “dead on,” confirming its reliability for demanding woodworking projects․
The inherent accuracy of the Makita track system minimizes the need for extensive adjustments, streamlining the workflow․ Integrating a rail square enhances the system’s versatility, allowing for precise angled cuts beyond the saw’s native capabilities․ Many woodworkers choose Makita for its build quality and consistent performance, making it a popular choice for both professionals and hobbyists seeking a high-quality cutting solution․

Advanced Considerations
For frequent cuts, pre-setting angles on table saws with indicators boosts efficiency․ Track saw guides ensure consistently square cuts, vital for complex woodworking projects․
Cutting Frequently Used Angles
Achieving consistent results with common angles, such as 45 or 90 degrees, requires a streamlined approach․ Utilizing a miter box is a straightforward method for these standard cuts, providing a reliable guide for beginners and experienced woodworkers alike․ However, for repeated cuts at the same angle, investing in a dedicated saw angle guide or indicator proves invaluable․
Table saw systems often feature adjustable angle scales and locking mechanisms, allowing you to quickly and accurately set frequently used horizontal cutting angles․ Remember to securely lock the angle after adjustment to prevent drift during operation․ With practice and the right tools, consistently achieving precise angles becomes second nature, elevating the quality and efficiency of your woodworking projects․
Adjusting Table Saw Angles with Indicators
Precise angle adjustments on a table saw are crucial for accurate cuts․ Begin by releasing the table lock and carefully turning the saw table using the locking knob, referencing the saw angle indicator․ This indicator provides a visual guide to set the desired horizontal angle, ensuring repeatability․ Always double-check the setting against a known square before making any cuts, especially for critical joinery․
High-quality indicators offer clear markings and minimal parallax error, enhancing accuracy․ Securely tighten the table lock once the desired angle is set, preventing unwanted movement during operation․ Regularly calibrate your indicator to maintain its accuracy, ensuring consistent results over time․ Mastering this process is fundamental for achieving professional-quality angled cuts․
Ensuring Square Cuts with Track Saw Guides
Track saw guides, like the TSO Rail Square or Insta-RailSquare, are invaluable for achieving perfectly square cuts, especially on larger sheet goods․ These guides attach directly to the track, providing a reliable 90-degree reference point for your saw․ Before cutting, meticulously align the guide with your marked line, ensuring a snug fit against the workpiece․
Proper setup is paramount; any misalignment will translate directly into an inaccurate cut․ Regularly check the squareness of the guide using a precision square․ A Makita track saw system, when paired with a compatible square, offers exceptional accuracy․ Secure the track firmly to prevent movement during the cut, maximizing precision and minimizing blade drift․

Troubleshooting Common Issues
Common problems with saw angle guides include slippage and blade drift; securing methods and drift correction techniques are vital for maintaining accuracy during cuts․
Guide Slippage and Securing Methods
A frequent challenge when utilizing saw angle guides is preventing slippage during the cutting process․ This can lead to inaccurate angles and wasted material․ Several methods can effectively address this issue․ Firstly, ensure the guide is firmly clamped to the workpiece, utilizing robust clamps designed for woodworking․ Consider adding a non-slip material, like rubber sheeting, between the guide and the wood surface to increase friction․
For track saw setups, verify the track is securely fastened to the workpiece, preventing any movement․ Double-sided tape can provide an additional layer of security․ When using a 2×4 as a guide, multiple clamps spaced along its length are crucial․ Regularly check clamp tightness throughout the cut․ Finally, always prioritize a clean and debris-free work surface to maximize grip and minimize the risk of unwanted movement․
Blade Drift and Correction Techniques
Blade drift, the tendency of a saw blade to deviate from a straight line during a cut, is a common issue impacting accuracy, even with saw angle guides․ Several factors contribute to drift, including blade sharpness, saw alignment, and the quality of the saw’s bearings․ Regularly sharpen your blades and ensure your saw is properly calibrated․ Inspect and maintain the saw’s bearings to minimize friction and wobble․
To correct for minor drift, gently apply pressure to the saw base in the direction opposite the drift․ For more significant drift, consider using a featherboard to maintain consistent pressure against the workpiece․ When using a track saw, ensure the blade is perfectly aligned with the track․ Finally, practice consistent cutting technique, maintaining a steady hand and controlled feed rate․