
Bridgeport mills revolutionized machining with their knee mill design‚ becoming iconic for both hobbyists and professionals. Understanding its history unlocks its potential.
Historical Significance of the Bridgeport Mill
The Bridgeport mill‚ originating in the early 20th century‚ quickly became a cornerstone of American manufacturing. Initially developed for toolroom work during World War II‚ its robust design and adaptability proved invaluable. Bridgeport’s innovation lay in its knee-type construction‚ offering versatility for a wide range of machining operations.
This design allowed machinists to efficiently handle diverse tasks‚ from creating intricate molds to producing essential parts. The mill’s widespread adoption wasn’t just due to its functionality; its relatively affordable price point democratized access to precision machining.
Consequently‚ the Bridgeport mill fueled post-war industrial growth and remains a symbol of American ingenuity‚ continuing to be a vital tool in modern workshops today.
Key Features and Design Elements
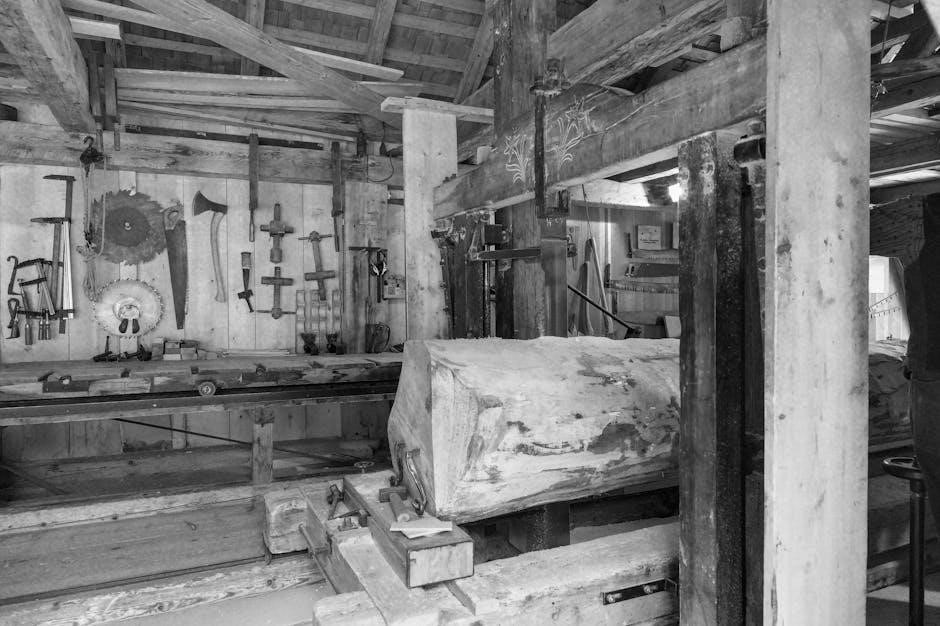
The Bridgeport mill’s defining characteristic is its knee-and-column construction‚ enabling X‚ Y‚ and Z-axis movement for precise material removal. A substantial gray cast iron frame provides rigidity‚ crucial for handling heavy cuts in tough materials despite its approximately 2‚000-pound weight. This robust frame minimizes vibration and ensures accuracy.
The spindle‚ responsible for rotating the cutting tool‚ is a key component‚ often driven by a 2HP motor in Series I models. Controls – numerous knobs‚ handles‚ and buttons – facilitate precise adjustments.
Furthermore‚ the mill’s table allows for workpiece clamping and movement‚ while the knee elevates and lowers the entire column‚ expanding machining capabilities. These elements combine to create a versatile and durable machine tool.

Understanding the Bridgeport Mill’s Mechanics
Bridgeport mills utilize a knee mill design‚ featuring X‚ Y‚ and Z-axis movements‚ powered by a spindle and drive system within a rigid frame.
The Knee Mill Design Explained
The Bridgeport mill’s defining characteristic is its knee and column construction. This design provides exceptional rigidity and allows for versatile movement across three axes: X (table transverse)‚ Y (table longitudinal)‚ and Z (spindle vertical). The “knee” is the large‚ cast-iron component supporting the table and enabling its up-and-down movement;
Raising and lowering the knee adjusts the workpiece’s vertical position relative to the spindle. The column houses the spindle and provides a mounting point for the head‚ which contains the motor and drive system. This configuration allows operators to precisely position the cutting tool for various milling operations. The knee’s robust construction is crucial for handling heavy cuts in tough materials‚ a hallmark of Bridgeport mills.
Frame Construction and Material (Gray Cast Iron)
The Bridgeport mill’s frame is predominantly constructed from gray cast iron‚ a material chosen for its exceptional damping characteristics and rigidity. This robust construction minimizes vibrations during operation‚ leading to improved surface finishes and accuracy. Despite weighing around 2‚000 pounds‚ the cast iron frame allows machinists to take heavy cuts in challenging materials.
Gray cast iron effectively absorbs shock and reduces chatter‚ contributing to the mill’s stability. The solid frame design distributes loads evenly‚ preventing deflection and maintaining precision. This inherent strength and damping capability are key factors in the Bridgeport’s reputation for durability and performance‚ making it a reliable workhorse in machine shops worldwide.
Spindle and Drive System

The Bridgeport mill’s spindle is a critical component‚ responsible for holding and rotating the cutting tools; Typically‚ these mills feature a variable-speed drive system‚ allowing operators to adjust spindle speed to suit different materials and cutting operations. Common drive systems include belt-driven configurations‚ offering a range of speeds for versatility.
A 2HP motor‚ as seen in Series 1 models‚ powers the spindle‚ providing sufficient torque for various milling tasks. Understanding the spindle’s capabilities and limitations is crucial for optimal performance. Proper maintenance‚ including lubrication and bearing checks‚ ensures smooth operation and extends the spindle’s lifespan‚ contributing to the mill’s overall reliability.

Operating the Bridgeport Mill: A Beginner’s Guide
Safe operation requires understanding controls and procedures; mastering these steps unlocks the Bridgeport’s capabilities‚ enabling precise and efficient machining for all users.
Safety Precautions and Best Practices
Prioritizing safety is paramount when operating a Bridgeport mill. Always wear appropriate personal protective equipment (PPE)‚ including safety glasses‚ and secure loose clothing and hair. Before starting any operation‚ thoroughly inspect the machine for any damage or loose parts. Ensure the work piece is securely clamped to the table‚ preventing movement during machining.
Understand the function of the emergency stop button and its location. Never leave the machine running unattended. Be mindful of chip evacuation‚ using brushes or vacuums – never hands – to clear debris. Familiarize yourself with the machine’s manual and adhere to all recommended safety guidelines. Proper guarding and awareness of rotating parts are crucial for preventing injuries. A safe workspace contributes to accurate and efficient milling.
Identifying and Understanding Controls (Knobs‚ Handles‚ Buttons)
Mastering the controls of a Bridgeport mill is essential for precise operation. The various levers‚ handles‚ and buttons govern movement along the X‚ Y‚ and Z axes‚ as well as spindle speed and feed rate. The knee elevating screw controls vertical movement‚ while table locks secure the workpiece. Understanding the function of each knob – for fine adjustments – is crucial.
The power feed lever engages automatic table movement‚ and the spindle start/stop button initiates rotation. Familiarize yourself with the coolant control to manage heat and chip removal. A thorough understanding‚ guided by the machine’s manual‚ allows for smooth and accurate milling. Knowing what each control does prevents errors and maximizes efficiency.
Basic Milling Operations
Initiating basic milling involves securely mounting your workpiece to the Bridgeport’s table using clamps or a vise. Select the appropriate end mill for the material and desired cut‚ ensuring it’s firmly secured in the spindle. Begin with simple operations like facing – creating a flat surface – or slotting‚ cutting a channel into the material.
Always start with slow feed rates and light cuts‚ gradually increasing as you gain confidence. Utilize the machine’s controls to move the table and spindle systematically‚ following a planned path. Remember to apply coolant to lubricate the cutting tool and remove chips. Practice these fundamental techniques to build proficiency and prepare for more complex milling tasks.
Milling Techniques and Considerations
Effective milling requires choosing between climb and conventional methods‚ understanding end mill rotation’s impact‚ and carefully managing cuts in tougher materials.
Climb Milling vs. Conventional Milling
Climb milling and conventional milling represent fundamentally different approaches to material removal on a Bridgeport mill‚ each with distinct advantages and disadvantages. Conventional milling directs the cutter into the workpiece‚ against the direction of travel‚ potentially leading to chatter and a less refined surface finish. Conversely‚ climb milling moves the cutter with the direction of travel.
While climb milling generally produces a superior finish and reduces chatter‚ it demands greater machine rigidity and careful attention to setup. The cutter’s tendency to “climb” over the work can cause it to pull the workpiece along‚ requiring secure clamping. Avoiding climb milling‚ especially for beginners‚ is often advised due to its sensitivity. Mastering both techniques allows operators to optimize performance based on material‚ cutter geometry‚ and machine capabilities.
The Impact of End Mill Rotation on Workpiece
End mill rotation profoundly influences how a Bridgeport mill interacts with the workpiece‚ dictating cutting forces and overall stability. The cutter’s rotation can either pull or push the workpiece‚ directly affecting the direction of travel and the potential for chatter. Understanding this dynamic is crucial for achieving accurate and efficient machining.
Incorrectly accounting for rotational forces can lead to undesirable results‚ including workpiece deflection and a compromised surface finish. The direction of the cutter’s teeth engaging the material generates forces that must be countered by robust workholding and appropriate feed rates. Careful consideration of rotation‚ coupled with climb or conventional milling selection‚ ensures optimal cutting performance and minimizes the risk of tool breakage or workpiece damage.
Taking Heavy Cuts in Tough Materials
Bridgeport mills‚ despite weighing around 2‚000 pounds‚ are capable of taking surprisingly heavy cuts in challenging materials. This capability stems from the mill’s robust construction‚ particularly its solid gray cast iron frame‚ which provides exceptional rigidity and dampens vibrations. However‚ successful heavy cuts require careful setup and technique.
Machinists must prioritize secure workholding‚ appropriate cutting speeds and feeds‚ and the selection of durable‚ high-quality end mills. Gradual increases in depth of cut‚ combined with ample coolant‚ help manage heat and chip evacuation. Proper gib adjustment is also vital to maintain precision and prevent unwanted movement during aggressive machining operations. Mastering these elements unlocks the Bridgeport’s potential for tackling demanding projects.

Maintenance and Troubleshooting
Regular maintenance is crucial for longevity; address common issues promptly using manuals and online resources like Practical Machinist for solutions.
Regular Maintenance Procedures
Consistent upkeep ensures optimal Bridgeport mill performance and extends its lifespan. Daily‚ wipe down all surfaces to remove chips and coolant‚ preventing rust. Weekly‚ lubricate the ways‚ leadscrews‚ and spindle bearings with appropriate oil – consult your manual for specific recommendations.

Monthly‚ check and adjust gibs for proper tightness‚ ensuring smooth table travel. Inspect coolant levels and concentration‚ replenishing or changing as needed. Annually‚ thoroughly clean the mill‚ inspect belts for wear‚ and check electrical connections. Don’t neglect the spindle; periodic inspection and potential bearing replacement are vital. Refer to the Bridgeport Series I manual for detailed schedules and procedures. Proper maintenance avoids costly repairs and downtime‚ keeping your mill running efficiently for years to come.
Common Issues and Their Solutions
Bridgeport mills‚ while robust‚ can experience issues. A common problem is excessive table drift‚ often caused by loose gibs – tighten them carefully. Spindle runout can stem from worn bearings; replacement‚ guided by the parts manual‚ is necessary. If the mill lacks power‚ check the breaker‚ wiring‚ and motor brushes.
Erratic feeds might indicate a worn leadscrew or nut‚ requiring lubrication or replacement. Coolant pump failures are frequent; inspect the impeller and power supply. Always consult the Bridgeport Series I manual for troubleshooting specific error codes or symptoms. Online forums like Practical Machinist offer valuable community support. Remember safety first – disconnect power before any repairs. Addressing issues promptly prevents further damage and ensures continued operation.

Resources and Manuals
Essential resources include Bridgeport Series I manuals‚ detailed parts diagrams‚ and thriving online communities like Practical Machinist for support and knowledge.
Bridgeport Series I Milling Machine Manuals
Locating original Bridgeport Series I manuals is crucial for proper operation and maintenance. These manuals‚ often available for purchase on platforms like eBay‚ provide detailed instructions covering installation‚ operation‚ and essential maintenance procedures. A Bridgeport Series I Parts Manual‚ containing 25 pages‚ offers exploded views and part numbers for efficient repairs and replacements.
These resources are invaluable for understanding the machine’s intricacies. Manuals detail safety precautions‚ control functions‚ and recommended operating parameters. Accessing these documents empowers operators to maximize the mill’s capabilities while ensuring safe and effective use. Digital copies may also be found through online forums and dedicated machining communities‚ supplementing physical copies for convenient access.
Parts Manuals and Diagrams
Detailed parts manuals and diagrams are essential for Bridgeport mill maintenance and repair. These resources‚ often found alongside the main operation manuals‚ provide exploded views of the mill’s components‚ clearly identifying each part with a corresponding number. The Bridgeport Series I Milling Machine M-105 Parts Manual‚ for example‚ spans 25 pages‚ offering comprehensive coverage.
Access to these diagrams simplifies troubleshooting and ensures accurate parts ordering. Whether replacing worn components or undertaking a complete overhaul‚ these manuals minimize downtime and maintain the mill’s precision. Supplementing these with online resources and community forums can further aid in identifying obscure or discontinued parts‚ ensuring long-term usability.
Online Forums and Communities (Practical Machinist)
Online forums‚ particularly Practical Machinist‚ represent invaluable resources for Bridgeport mill owners and operators. These communities foster knowledge sharing‚ offering a platform to ask questions‚ discuss troubleshooting‚ and exchange experiences. Users frequently share digitized manuals‚ parts diagrams‚ and operational tips‚ supplementing official documentation.
Practical Machinist’s extensive archives contain a wealth of information regarding Bridgeport mills‚ covering everything from basic operation to advanced techniques. The collective expertise within these forums can significantly accelerate the learning curve for beginners and provide seasoned machinists with solutions to complex problems. Active participation unlocks a network of support and shared knowledge.

Digital Readout (DRO) Integration
DROs enhance Bridgeport mills by providing precise positioning data‚ improving accuracy and efficiency. Installation and calibration are crucial for optimal performance and usability.
Benefits of Using a DRO
Integrating a Digital Readout (DRO) into a Bridgeport mill significantly elevates machining capabilities. Traditionally‚ operators relied on the machine’s dials for measurements‚ a process prone to human error and time-consuming. A DRO provides real-time positional feedback‚ displaying coordinates directly on a digital screen‚ drastically improving accuracy and reducing setup times.
This enhanced precision translates to tighter tolerances and improved surface finishes. Furthermore‚ DROs simplify complex operations like angled milling and drilling‚ making them accessible to a wider range of skill levels. The ability to quickly and accurately measure workpiece dimensions also streamlines quality control processes. Ultimately‚ a DRO boosts productivity‚ minimizes scrap‚ and unlocks the full potential of the Bridgeport mill‚ transforming it into a more versatile and efficient machining center.
Installation and Calibration
DRO installation typically involves mounting the scales to the mill’s axes (X‚ Y‚ and Z) and connecting them to the readout unit. Careful alignment is crucial for accurate readings; scales must be parallel to the machine’s travel. Following the manufacturer’s instructions precisely is paramount‚ as incorrect mounting can introduce errors.
Calibration is the process of teaching the DRO the machine’s zero points and travel limits. This usually involves jogging the machine to known positions and inputting those values into the DRO’s memory. Fine-tuning may be required to compensate for any inherent machine inaccuracies. Regular calibration checks are recommended to maintain precision‚ especially after any maintenance or adjustments to the mill itself. Proper installation and calibration are vital for realizing the full benefits of a DRO system.

Advanced Milling Concepts
Gib adjustment is critical for maintaining rigidity and eliminating backlash in the knee and column movements‚ ensuring precision and stability during operation.
Gib Adjustment and Importance
Gibs are adjustable elements within the dovetail slides of a Bridgeport mill‚ crucial for maintaining rigidity and precision. They eliminate backlash‚ ensuring tight movement along the machine’s axes. Proper adjustment involves tightening the gib just enough to remove play without creating excessive friction‚ which hinders smooth operation and can damage surfaces.
Too loose‚ and the table or knee will wander‚ impacting accuracy; too tight‚ and it restricts movement and generates heat. Regular checks and adjustments are vital‚ especially with frequent use. Signs of improper adjustment include jerky motion or noticeable play when moving the table or knee. Maintaining correct gib adjustment directly translates to improved milling accuracy and extended machine life‚ safeguarding your investment and work quality.