
Welcome! This manual guides you through your Full HD 1080P WIFI Car DVR. It’s designed for recording audio and video while driving, offering peace of mind and potential evidence.
Featuring 1920×1080 resolution, this dash cam delivers clear, detailed footage. It includes essential controls: Power, R, OK, Lock, and a Power Port for easy operation.
What is a Dash Cam?
A dash cam, or dashboard camera, is a small, forward-facing video recorder typically mounted on a vehicle’s windshield. Its primary function is to continuously record the road ahead – and sometimes the interior of the vehicle – while you drive. Think of it as a silent witness, capturing crucial video and audio information.
This device can be invaluable in several situations. It provides evidence in the event of an accident, potentially resolving disputes about fault. It can also document road trips, scenic drives, or even unexpected events like near misses or erratic driving behavior from others. Essentially, a dash cam offers a layer of security and documentation while on the road.
Modern dash cams, like this FHD 1080P model, often include features like loop recording and G-sensor technology for enhanced functionality.
Why Choose FHD 1080P?
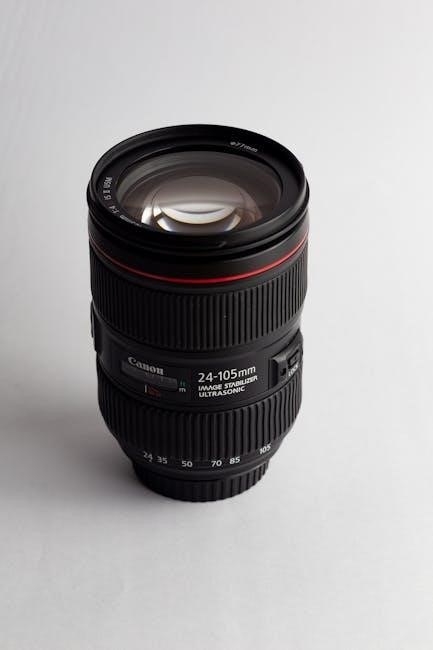
FHD, or Full High Definition, represents a significant leap in video quality compared to standard definition (SD) or even HD (720P) dash cams. With a resolution of 1920×1080 pixels – totaling over 2 million pixels – FHD 1080P captures remarkably clear and detailed footage.
This higher resolution is crucial for identifying important details like license plates, road signs, and other vehicles. In the event of an incident, clearer footage translates to more reliable evidence. While QHD and UHD offer even higher resolutions, FHD 1080P strikes an excellent balance between image quality and storage space requirements.
Choosing FHD ensures you’re getting a sharp, usable recording that can make a real difference when you need it most, providing peace of mind on every journey.

Understanding the Key Features
Explore core functionalities! This dash cam boasts FHD resolution, convenient Wi-Fi connectivity, and reliable loop recording, ensuring continuous and efficient operation on the road.
FHD Resolution: 1920×1080 Explained
What is FHD? FHD, or Full High Definition, signifies a resolution of 1920×1080 pixels, totaling over 2 million pixels. This standard is a popular choice, delivering excellent image clarity and detail for your driving recordings.
Compared to HD (1280×720), FHD provides a noticeably sharper and more detailed picture. The increased pixel count captures finer nuances, crucial for identifying license plates, road signs, and other important details in the event of an incident.
Essentially, a higher resolution means a clearer, more informative video. Your dash cam utilizes this technology to ensure you have high-quality evidence when you need it most, offering a superior visual experience during playback.
Wi-Fi Connectivity and its Benefits
Seamless Data Transfer: Your FHD 1080P dash cam features built-in Wi-Fi connectivity, enabling convenient wireless transfer of recorded footage to your smartphone or tablet. Upon powering on, Wi-Fi automatically activates, though it can be disabled via the Down button if preferred.
This eliminates the need for physically removing the TF card and connecting it to a computer. Through a dedicated app (refer to separate app instructions), you can easily view, download, and share videos directly from the dash cam.
Wi-Fi also facilitates firmware updates, ensuring your device has the latest features and improvements. Enjoy quick and effortless access to your recordings with this valuable connectivity feature.
Loop Recording Functionality
Continuous Recording: The loop recording function ensures your dash cam continuously records without interruption, even when the TF card reaches full capacity. Older, unprotected footage is automatically overwritten with new recordings, maximizing storage efficiency.
You can customize the loop recording duration through the dash cam’s settings, choosing between 1-minute, 3-minute, or 5-minute intervals. This allows you to balance storage space with desired video segment lengths.
Important events can be protected from overwriting by manually locking video files (see ‘Lock Button’ section). Loop recording provides constant surveillance during your drives, offering a reliable record of your journeys.
Dash Cam Components & Controls
Key Features: Your dash cam features five essential buttons – Power, R (Reset/Menu), OK, Lock, and the Power Port. These controls manage all functions.
Power Button Operation
Initiating Operation: A short press of the Power button activates or deactivates the dash cam, initiating or ceasing recording. Observe the indicator light to confirm the operational status – a steady light typically signifies recording is active.
Powering Off: To completely power down the device, press and hold the Power button for approximately three seconds. Ensure the device is fully powered off when not in use to conserve battery life and prevent potential issues.
Automatic Activation: Many models are designed to automatically power on and begin recording when the vehicle ignition is turned on, providing seamless operation. This feature can often be adjusted within the settings menu.
Important Note: Avoid repeatedly pressing the Power button during recording, as this may interrupt the process or cause unintended pauses in the footage.
R (Reset/Menu) Button Function
Accessing the Menu: A short press of the ‘R’ button typically grants access to the dash cam’s settings menu. This allows you to customize various parameters, including resolution, loop recording duration, and Wi-Fi settings.
Navigating the Menu: Within the menu, subsequent presses of the ‘R’ button cycle through the available options. Use the OK button to select and confirm your desired settings.
Resetting to Factory Defaults: A long press of the ‘R’ button, often for around 10 seconds, initiates a reset to the factory default settings. This can resolve software glitches or restore the device to its original configuration.
Caution: Resetting will erase all custom settings, so proceed with caution. Refer to the troubleshooting section if issues persist after a reset.
OK Button Usage
Confirming Selections: The ‘OK’ button serves as the primary confirmation key for navigating the dash cam’s menu system. After highlighting a desired setting using the ‘R’ button, press ‘OK’ to apply the change.
Initiating Actions: Beyond menu navigation, the ‘OK’ button can also initiate specific actions. For example, it may be used to start or stop manual video recording, or to confirm a lock of a video file.
Playback Control: During video playback, the ‘OK’ button often functions as a pause/play toggle. Pressing it once pauses the video, and pressing it again resumes playback.
Multi-Functionality: Depending on the current screen or mode, the ‘OK’ button’s function may vary. Always observe the on-screen prompts for clarification.
Lock Button – Protecting Important Footage
Preventing Overwriting: The ‘Lock’ button is crucial for safeguarding critical footage from being automatically overwritten during loop recording. When activated, the currently recording video file, or the one currently playing back, is marked as ‘protected.’
Emergency Situations: Utilize the ‘Lock’ button immediately during any incident – a near miss, accident, or noteworthy event. This ensures the corresponding video is preserved for later review.
Accessing Locked Files: Locked files are typically stored in a separate, protected folder within the TF card. Accessing these files requires navigating to this specific folder through the dash cam’s playback menu or on a computer.
Manual Override: While locked files are protected, they can usually be manually unlocked and deleted if needed, providing flexibility in managing storage space.
Power Port Connection
Essential Power Source: The Power Port is the primary interface for supplying power to your FHD 1080P dash cam. It allows for continuous operation while driving, ensuring uninterrupted recording capabilities.
Connecting the Cable: Carefully insert the provided power cable into the designated Power Port on the dash cam. Ensure a secure connection to prevent interruptions during use. The other end connects to your vehicle’s cigarette lighter or a dedicated USB power adapter.
Automatic Activation: Upon connecting to a power source, the dash cam typically powers on automatically and initiates recording. Some models may require a manual power-on press.
Stable Voltage: Utilize a reliable power source to maintain a stable voltage, preventing potential issues like recording errors or device malfunction. Avoid using damaged or faulty power adapters.

Setting Up Your Dash Cam
Initial Configuration: Power on your FHD 1080P dash cam and configure essential settings like resolution (1080P/720P), loop recording duration, and Wi-Fi connectivity.
Initial Power-On and Configuration
First-Time Setup: Upon initial power-on, your FHD 1080P dash cam will begin the configuration process. Ensure the TF card is properly inserted to enable recording functionality. The device will likely prompt you to set the current date and time accurately; this is crucial for event timestamps.
Wi-Fi Activation: The dash cam automatically activates Wi-Fi when powered on. If you wish to disable it, press and hold the Down button. Connecting to Wi-Fi allows for convenient file transfer and potential remote control via a smartphone application.
Language Selection: You may be prompted to select your preferred language for the user interface. Navigate through the options using the control buttons and confirm your choice. Proper initial setup ensures optimal performance and usability.
Adjusting Video Resolution (1080P vs 720P)
Resolution Options: Your dash cam offers two primary video resolution settings: Full HD 1080P (1920×1080) and HD 720P (1280×720). 1080P provides significantly sharper and more detailed footage, capturing finer details in recorded events. While 720P conserves storage space, it compromises on image clarity.
Accessing Settings: To adjust the resolution, navigate to the video settings menu using the ‘R’ (Reset/Menu) and ‘OK’ buttons. Select the ‘Resolution’ option and choose between 1080P and 720P. Consider your storage capacity and desired level of detail when making your selection.
Recommendation: For optimal clarity and evidence quality, we recommend utilizing the 1080P resolution setting whenever possible.
Configuring Loop Recording Duration (1min, 3min, 5min)
Loop Recording Explained: Loop recording automatically overwrites the oldest footage when the TF card reaches full capacity, ensuring continuous recording. You can customize the segment length for this process.
Setting the Duration: Access the loop recording settings through the main menu using the ‘R’ and ‘OK’ buttons. Options include 1-minute, 3-minute, and 5-minute intervals. Shorter durations mean more frequent overwrites, while longer durations preserve footage for a longer period before overwriting.
Recommendation: A 3-minute loop duration offers a good balance between storage efficiency and retaining useful footage. Adjust based on your driving habits and storage card size.
Wi-Fi Setup and Connection
Enabling Wi-Fi: Your dash cam features built-in Wi-Fi for convenient file transfer and settings adjustments. Upon powering on, Wi-Fi activates automatically. To disable it, press and hold the ‘Down’ button.
Connecting to Your Smartphone: Download the compatible app (refer to the quick start guide for the app name). Open your smartphone’s Wi-Fi settings and locate the dash cam’s network (usually named something like “CarDVR-XXXX”). Connect to this network – no password is typically required.
App Pairing: Launch the app and follow the on-screen instructions to pair with your dash cam. This allows you to view live footage, download recordings, and modify settings directly from your phone.
Recording and Playback
Start/Stop: Initiate recording with a simple press of the Power button; Lock crucial footage manually using the Lock button to prevent overwriting;
Accessing Files: View recorded videos directly on the dash cam’s screen or transfer them to your smartphone via Wi-Fi.
Starting and Stopping a Recording
Initiating a Recording: To begin recording, simply press the Power button once. The dash cam will automatically start capturing video and audio, indicated by a recording icon on the display. Ensure the TF card is properly inserted and has sufficient storage space before starting.
Automatic Recording: Many dash cams are designed to start recording automatically upon powering on. Verify this setting in the configuration menu if you prefer continuous recording during vehicle operation. The device records audio and video information while driving.
Stopping a Recording: To halt the recording process, press the Power button again. The recording icon will disappear, signifying that the camera has ceased capturing footage. The current video file will be saved automatically.
Important Note: Always check the recorded footage periodically to confirm the dash cam is functioning correctly and capturing clear video.
Manually Locking a Video File
Protecting Important Footage: The Lock button is crucial for safeguarding critical recordings from being overwritten during loop recording. Pressing the Lock button during a recording instantly protects the current video file.
Locked File Identification: Locked files are typically marked with a special icon on the dash cam’s display and within the file system on the TF card, making them easily identifiable during playback.
Accessing Locked Files: To view locked files, navigate to the protected or locked video folder on the TF card using a computer. These files will not be deleted by the loop recording function.
Why Lock Files? Use this feature to preserve evidence of incidents, accidents, or noteworthy events captured while driving, ensuring the footage remains available when needed.
Accessing Recorded Footage
Retrieving Your Recordings: To view recorded footage, first, ensure the dash cam is powered off. Then, carefully remove the TF card from the device. Insert the TF card into a card reader connected to your computer.
File Structure: The TF card will contain folders organized by date. Within each date folder, you’ll find video files recorded on that day. Locked files will be in a separate, designated “Locked” or “Protected” folder.
Playback Options: Use a compatible video player on your computer to view the recordings. Common formats supported include MP4. Ensure your computer has the necessary codecs installed.
Direct Playback (if supported): Some dash cams allow direct playback of footage on the device’s screen via the menu system, offering a convenient viewing option.
Playback Controls and Navigation
Navigating Footage: When playing back recordings on the dash cam’s screen, use the Power button to pause/play. The OK button typically serves as a confirmation or enter key for menu selections during playback.
Fast Forward/Rewind: The R (Reset/Menu) button often functions as a fast forward/rewind control when pressed and held. Short presses may navigate between files.
Volume Control: If audio is recorded, adjust the volume using the designated volume controls within the playback menu. Some models may have dedicated volume buttons.
File Selection: Utilize the directional buttons (if available) or the R/OK buttons to scroll through and select specific video files for viewing. Ensure proper file organization for easy access.
Advanced Settings & Troubleshooting
Customize & Resolve Issues: Adjust date/time, G-sensor sensitivity, and troubleshoot common problems like power or recording failures. Refer to the manual for solutions.
Date and Time Adjustment
Accurate timestamps are crucial for event documentation. To adjust the date and time on your FHD 1080P dash cam, navigate to the settings menu using the ‘R’ (Reset/Menu) button.
Within the menu, locate the ‘Date & Time’ option. Use the ‘OK’ button to select it, and then utilize the ‘Power’ and ‘R’ buttons to modify the year, month, day, hour, and minute.
Confirm each selection with the ‘OK’ button. Ensure the correct date and time are set for accurate recording references. Incorrect settings can lead to confusion when reviewing footage, especially in incident investigations.
Double-check your adjustments before exiting the settings menu to guarantee precise timekeeping for all recorded videos.
G-Sensor Sensitivity Settings
The G-Sensor detects impacts and automatically locks the current footage, preventing overwriting. Adjusting the sensitivity determines how strong an impact triggers recording protection. Access the G-Sensor settings through the main menu using the ‘R’ button.
Sensitivity levels typically range from Low to High. Low sensitivity requires a significant impact to activate, reducing false triggers from bumps. High sensitivity will lock footage from even minor incidents.
Experiment to find the optimal setting for your driving conditions. A medium setting is often a good starting point. Use the ‘Power’ and ‘R’ buttons to adjust, confirming with ‘OK’.
Proper G-Sensor calibration ensures critical events are captured without excessive, unnecessary file locks.
Troubleshooting Common Issues (No Power, No Recording)
No Power: First, ensure the power cable is securely connected to both the dash cam and your vehicle’s power port. Check your vehicle’s ignition – the cam requires power when the car is running. Test with a different power port or cable if possible.
No Recording: Verify the TF card is inserted correctly and has sufficient capacity. Format the card through the dash cam’s menu if needed. Confirm loop recording isn’t disabled, and the recording duration is set appropriately.
If issues persist, try a reset using the ‘R’ button. Ensure the date and time are correctly set. If Wi-Fi is enabled, temporarily disable it to see if it resolves the problem.

Maintaining Your Dash Cam
Proper care ensures longevity! Regularly manage your TF card’s capacity, clean the lens gently, and check for available firmware updates to optimize performance.
TF Card Management and Capacity
Optimal performance relies on proper TF card management. Your FHD 1080P dash cam utilizes a TF (MicroSD) card for storing recorded footage. Capacity directly impacts recording time; larger cards allow for longer durations before loop recording overwrites older files.
We recommend using a high-endurance TF card specifically designed for dash cams, as these are built to withstand the constant read/write cycles. Card capacities typically range from 32GB to 128GB, or even 256GB, depending on your needs and the dash cam’s compatibility.
Periodically format the TF card within the dash cam’s settings to maintain optimal performance and prevent potential errors. Avoid removing the card while the dash cam is powered on. Regularly check the card for errors and replace it if necessary.
Cleaning and Care Instructions
Maintaining your FHD 1080P dash cam ensures longevity and optimal performance. Regularly clean the lens with a soft, dry microfiber cloth to remove dust, fingerprints, and smudges that can affect video quality. Avoid using abrasive cleaners or harsh chemicals, as these can damage the lens coating.
The dash cam’s exterior can be wiped down with a slightly damp cloth. Ensure the device is powered off before cleaning. Avoid exposing the dash cam to extreme temperatures or direct sunlight for extended periods.
Proper ventilation is crucial; do not cover the dash cam while in operation. Store the device in a cool, dry place when not in use. Handle the TF card with care, avoiding bending or dropping it.
Firmware Updates (If Applicable)
Periodically check the manufacturer’s website for firmware updates for your FHD 1080P dash cam. These updates can improve performance, fix bugs, and add new features. Download the latest firmware file to a compatible TF card.
Follow the instructions provided with the firmware update carefully. Typically, this involves inserting the TF card into the dash cam while it’s powered off, then powering it on to initiate the update process. Do not interrupt the update process, as this could damage the device.
Ensure the dash cam has sufficient battery or remains connected to a power source during the update; After the update is complete, the dash cam may restart automatically.

Safety Information & Legal Considerations
Mount your dash cam carefully, avoiding obstruction of your view. Always comply with local laws regarding dash cam usage and data privacy regulations.
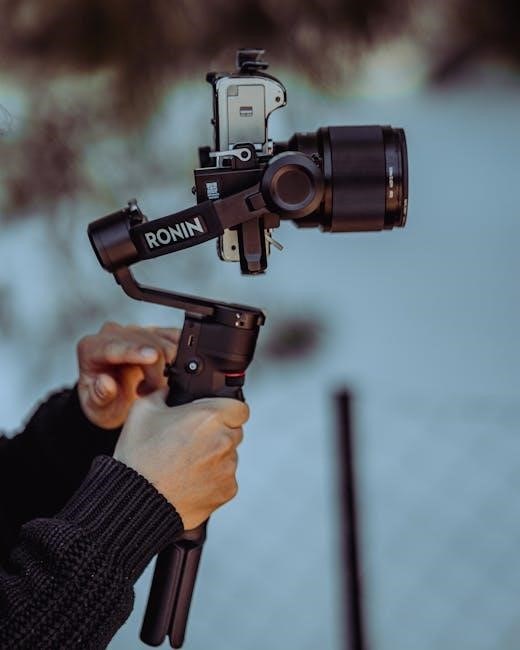
Proper Mounting Location
Selecting the optimal mounting location is crucial for maximizing your dash cam’s effectiveness and ensuring driver safety. The ideal position is behind your rearview mirror, centered on the windshield. This placement minimizes obstruction of your forward view while providing a comprehensive recording angle of the road ahead.
Avoid mounting the dash cam too low, as this can lead to a restricted field of vision and potential blockage by the steering wheel or dashboard components. Ensure the mounting surface is clean and stable to prevent the device from detaching during operation.
Consider potential glare from sunlight or headlights when choosing a location. Adjust the camera angle to minimize reflections and maintain clear footage. Regularly check the mounting security to prevent unexpected dislodgement, especially during temperature fluctuations.
Legal Regulations Regarding Dash Cam Usage
Understanding local laws is paramount before operating your FHD 1080P dash cam. Regulations concerning audio and video recording vary significantly by region. Some jurisdictions require explicit consent from individuals being recorded, particularly regarding audio capture within the vehicle.
Check your state or country’s laws regarding the admissibility of dash cam footage as evidence in legal proceedings. Certain areas may have restrictions on where the camera can be mounted, potentially obstructing the driver’s view.
Be aware of privacy concerns and avoid recording areas where individuals have a reasonable expectation of privacy. It’s your responsibility to comply with all applicable laws and regulations while using this device.