
KitchenAid Microwave Oven Combo Manual: Comprehensive Guide
This comprehensive guide details operation, maintenance, and troubleshooting for your KitchenAid combination oven, encompassing both microwave and convection cooking features․

Understanding Your KitchenAid Combination Oven

Your KitchenAid combination oven seamlessly integrates microwave and convection oven technologies into a single, versatile appliance․ This design offers expanded cooking capabilities, from rapid reheating and defrosting with the microwave function to precise baking and roasting utilizing the convection oven․
Models like the KOEC530PBS feature Even-Heat True Convection, ensuring consistent temperatures and eliminating hot or cold spots for perfectly cooked dishes․ The unique bow-tie shaped design and convection fan contribute to even heat distribution․ Combination models also include a powerful 900-watt microwave component․ Familiarizing yourself with both sections – oven and microwave – is key to unlocking its full potential․ This manual will guide you through each feature․
Model and Serial Number Location
Locating your KitchenAid combination oven’s model and serial numbers is crucial for warranty registration, service requests, and accessing specific documentation․ These numbers uniquely identify your appliance․ Typically, you’ll find this information on the model/serial number plate․
This plate is generally positioned on the bottom edge of the control panel, visible when the oven door is open․ It’s essential to record both numbers accurately․ Having this information readily available will streamline any future interactions with KitchenAid customer support or authorized service technicians․ Refer to your specific model’s documentation if the location differs․
Identifying Key Components – Oven Section
The oven section of your KitchenAid combination appliance features several key components essential for proper operation․ These include the oven door lock latch, ensuring safety during self-cleaning or high-temperature cooking․ Oven racks, often including convenient roll-out options on select models, provide adjustable cooking surfaces․
Additionally, you’ll find oven lights illuminating the interior for visibility․ Crucially, the broil element, located at the top of the oven cavity, delivers intense, direct heat for broiling․ Understanding the location and function of each component will aid in maintenance and troubleshooting․
Oven Door Lock Latch
The oven door lock latch is a critical safety feature, automatically engaging during self-clean cycles and potentially during high-temperature baking․ This prevents accidental opening while the oven is extremely hot, protecting users from burns․ Located typically on the control panel or near the oven door, it physically locks the door shut․
Before initiating a self-clean cycle, ensure the latch is functioning correctly․ Do not attempt to force the door open while locked․ If the latch malfunctions, preventing normal oven operation, consult the troubleshooting section or contact KitchenAid customer support for assistance․ Proper latch function is paramount for safe appliance use․
Oven Racks (Including Roll-Out Options)
KitchenAid ovens utilize durable oven racks designed to support various cookware sizes and weights․ Standard racks slide into designated slots within the oven cavity, allowing for adjustable cooking positions․ Select models feature convenient roll-out racks, extending fully for easier access to dishes without reaching into a hot oven․
To adjust rack positions, fully extend the rack, lift slightly, and reposition to the desired slot․ Always ensure racks are securely seated before placing food inside․ Roll-out racks offer enhanced convenience and safety․ Refer to your model’s specific documentation for weight capacity limits and proper rack usage guidelines․
Broil Elements
KitchenAid ovens are equipped with powerful broil elements, typically located at the top of the oven cavity, designed for high-heat, direct cooking․ These elements provide intense radiant heat, ideal for browning, searing, and finishing dishes quickly․ Broiling is excellent for achieving a crispy exterior on foods like meats, vegetables, and casseroles․
Always use broil-safe cookware and maintain a safe distance between the food and the element to prevent burning․ Monitor food closely during broiling, as cooking times are significantly reduced․ Refer to your model’s manual for specific broiling instructions and recommended rack positions for optimal results․
Identifying Key Components – Microwave Section
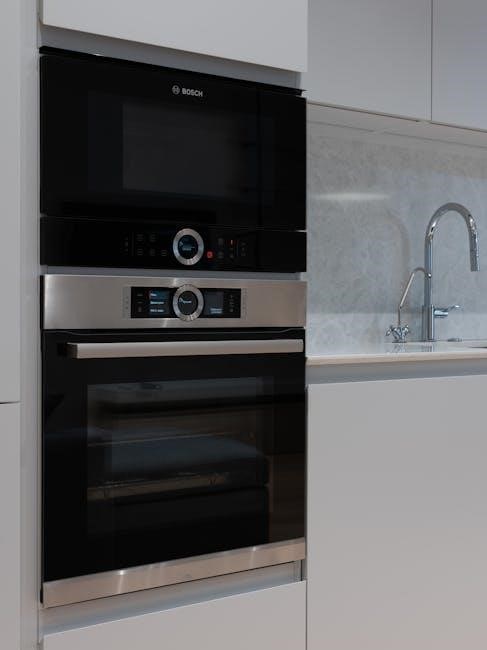
The microwave section of your KitchenAid combo oven features a 900-watt microwave, integrated seamlessly with the oven functionality․ Key components include the upper microwave oven itself, housing the magnetron which generates the microwaves, and a mirrored glass door for visibility․ A rotating plate ensures even cooking by distributing microwaves throughout the cavity․
Essential for operation is the control panel, offering digital settings for power levels and cooking times․ Internal oven lights illuminate the cooking process․ Understanding these components is crucial for efficient and safe microwave usage within your combination appliance․
Upper Microwave Oven Specifics
The upper section houses the microwave component, a 900-watt unit designed for versatile cooking․ It features a black painted plate with a mirrored glass door, providing both aesthetic appeal and visibility during operation․ Six power levels allow for precise control, from delicate defrosting to rapid reheating․
A rotating plate is integral to even cooking, ensuring microwaves distribute uniformly․ Digital controls facilitate easy programming of cooking times and power settings․ This upper oven section operates independently or in conjunction with convection features, offering flexible cooking options within the KitchenAid combination appliance․
Control Panel Overview
The control panel serves as the central hub for operating both the oven and microwave functions․ Digital displays clearly indicate settings, cooking times, and temperatures․ Dedicated buttons provide direct access to frequently used features like power levels, defrost, and air fry (on applicable models)․
Intuitive controls allow for seamless switching between oven modes – convection bake, broil, and roast – and microwave settings․ A start/cancel button initiates or halts cooking cycles․ The panel also incorporates safety features, such as a child lock option, preventing accidental operation․ Familiarizing yourself with the layout ensures efficient and precise control․
Operation: Oven Mode
To utilize the oven mode, begin by selecting your desired cooking function – bake, broil, convection bake, or roast – via the control panel․ Subsequently, input the precise oven temperature required for your recipe․ Accurate temperature setting is crucial for optimal results․ Next, set the cooking time using the designated controls; the oven will automatically shut off upon completion․
For convection cooking, ensure the convection fan is activated for even heat distribution․ Preheating is recommended for consistent baking․ Always use oven-safe cookware and follow recipe guidelines for placement within the oven cavity․ Monitor cooking progress through the oven window, avoiding frequent door openings․
Setting Oven Temperature and Cooking Time
Precisely setting temperature and time is fundamental to successful oven operation․ Utilize the digital control panel to input the desired temperature, typically ranging from 170°F to 550°F, depending on the selected cooking mode․ Confirm the temperature display before initiating the cooking process․ For time setting, employ the “+” and “-” buttons to adjust the cooking duration in minutes and seconds․
The oven offers a delay start function, allowing you to program a future cooking time․ Remember to account for preheating time when setting the overall cooking duration․ Always double-check your settings before pressing “Start” to avoid errors․
Convection Cooking Explained
Convection cooking utilizes a fan to circulate hot air throughout the oven cavity, resulting in faster and more even cooking․ This method is ideal for baking multiple items simultaneously or achieving crispy textures․ When using convection, reduce the recipe temperature by 25°F compared to conventional baking․
The KitchenAid’s Even-Heat True Convection system, with its unique bow-tie design and fan, minimizes hot spots and ensures consistent results․ For optimal performance, avoid overcrowding the oven and use low-sided baking sheets․ Convection is particularly effective for roasting meats and vegetables, promoting browning and sealing in juices․
Operation: Microwave Mode
To operate the microwave, press the ‘Microwave’ function on the control panel․ Utilize the number pad to input the desired cooking time, followed by selecting a power level․ KitchenAid microwaves offer multiple power levels, ranging from 10% to 100%, allowing for precise control over cooking intensity․ Lower power levels are ideal for delicate foods or defrosting․

The unit features a rotating plate to ensure even heating․ For larger dishes that don’t rotate, press the ‘Turntable On/Off’ button․ Always use microwave-safe containers and cover food to prevent splattering․ Remember to check food frequently during cooking, especially at higher power levels․
Power Levels and Usage
KitchenAid microwaves offer six distinct power levels, providing versatility for various cooking tasks․ 100% power (High) is best for rapid heating and boiling․ 70% (Medium-High) suits reheating leftovers and cooking vegetables․ 50% (Medium) is ideal for simmering sauces and softening butter․
30% (Medium-Low) gently warms delicate items, while 10% (Low) is perfect for defrosting and keeping food warm․ Utilize the control panel to cycle through these levels․ Remember, lower power levels require longer cooking times․ Experiment to find the optimal setting for each dish, ensuring even cooking and preventing overcooking․
Defrost Function Guide
The KitchenAid microwave’s defrost function utilizes low-power microwave energy to thaw frozen foods effectively․ Select the ‘Defrost’ option on the control panel, then input the food’s weight in pounds or kilograms․ The microwave automatically calculates the appropriate defrosting time․
For best results, remove food from its original packaging and place it in a microwave-safe dish․ Rotate or flip the food halfway through the defrosting cycle to ensure even thawing․ Always check the food’s temperature after defrosting and cook immediately to prevent bacterial growth․ Note that some foods defrost better with specific power levels․
Air Fry Mode – Features and Instructions (If Applicable)
If your KitchenAid combination oven includes an Air Fry mode, it offers a healthier way to achieve crispy, fried-like results with little to no oil․ Select the ‘Air Fry’ function on the control panel, then set the desired temperature and cooking time․ Utilize the included air fry basket or a microwave-safe, oven-compatible dish․
For optimal performance, avoid overcrowding the basket and ensure food is arranged in a single layer․ Regularly check and flip food halfway through the cooking process for even crisping․ Experiment with different temperatures and times to perfect your favorite air-fried recipes․
Cleaning and Maintenance
Regular cleaning ensures optimal performance and longevity of your KitchenAid combination oven․ For daily maintenance, wipe down the exterior with a damp cloth and mild detergent․ Clean the microwave interior after each use to prevent food buildup․ Removable oven racks and the air fry basket (if applicable) can be washed with warm, soapy water․
For deeper cleaning, consider the self-cleaning cycle (if equipped), following all safety precautions․ Alternatively, manual cleaning with oven cleaner is possible․ Always disconnect power before any extensive cleaning․ Avoid abrasive cleaners that could damage surfaces․
Self-Cleaning Cycle Operation
The self-cleaning cycle utilizes high temperatures to burn off food residue within the oven cavity․ Before initiating, remove oven racks, cookware, and any loose debris․ Ensure the oven door can securely lock․ Select the self-clean cycle on the control panel, choosing the desired cleaning duration – typically ranging from 2 to 4 hours․
During the cycle, the oven will heat to extremely high temperatures, producing odors․ Avoid opening the door until the cycle completes and the oven cools․ Once finished, wipe away any remaining ash with a damp cloth․ Caution: Never interrupt the self-clean cycle manually․
Manual Cleaning Procedures
For regular maintenance, manual cleaning is recommended․ Disconnect power before cleaning․ Use a mild dish soap and warm water solution to wipe down the interior surfaces, avoiding abrasive cleaners that can damage the finish․ Pay attention to spills and splatters, cleaning them promptly․
The oven racks can be removed and washed separately․ For stubborn residue, create a paste of baking soda and water, applying it to the affected areas and letting it sit before scrubbing gently․ Microwave section: Wipe down the interior with a damp cloth after each use․ Avoid using metal scouring pads․
Troubleshooting Common Issues – Oven
If the oven isn’t heating, first verify the power supply and ensure the control panel is properly set․ Check the oven’s thermal fuse, which may require professional replacement․ For uneven cooking, ensure racks are positioned correctly and avoid overcrowding․ Calibrate the oven temperature following the manual’s instructions․
If the oven light isn’t working, replace the bulb with a KitchenAid-approved replacement․ A faulty door latch can also prevent operation; inspect for damage․ Persistent issues may indicate a problem with the control board or heating elements, requiring service from a qualified technician․
Oven Not Heating
If your KitchenAid oven isn’t heating, begin by confirming the power supply is active and the circuit breaker hasn’t tripped․ Verify the control panel is correctly set to an oven mode with a set temperature and cooking time․ A common cause is a faulty thermal fuse, a safety device requiring professional replacement․ Inspect the igniter (for gas ovens) or heating elements (for electric ovens) for visible damage․
A malfunctioning oven control board can also prevent heating․ If these checks don’t resolve the issue, contact a qualified appliance repair technician for diagnosis and repair․ Do not attempt repairs yourself if you are not experienced․
Uneven Cooking Results
Experiencing uneven cooking? Ensure oven racks are positioned correctly and not overcrowded, allowing for proper air circulation․ Utilize the “Even-Heat True Convection” feature, if equipped, as it’s designed to eliminate hot and cold spots․ Verify the oven temperature is accurately calibrated; consider using an oven thermometer for confirmation․ For consistent results, preheat the oven thoroughly before placing food inside․
Avoid opening the oven door frequently during cooking, as this disrupts temperature stability․ If using multiple racks, rotate dishes halfway through the cooking process․ A malfunctioning convection fan can also contribute to uneven heating, requiring professional attention․
Troubleshooting Common Issues – Microwave
Microwave not heating? First, confirm the door is securely closed; the safety interlock prevents operation if ajar․ Check the power cord and circuit breaker․ If the issue persists, a faulty magnetron—the component generating microwaves—may require professional repair; A common problem is the rotating plate malfunctioning; ensure it’s properly seated on the drive coupling and isn’t obstructed․
Strange noises could indicate arcing, often caused by metal objects inside․ Avoid using metal containers or foil․ For digital control panels, a reset might resolve minor glitches․ Refer to the manual for specific error codes displayed․
Microwave Not Heating
If your KitchenAid microwave isn’t heating, begin by verifying the door closes securely․ The safety interlock system prevents operation when the door is open․ Inspect the power cord connection and confirm the circuit breaker hasn’t tripped․ A faulty door switch can also cause this issue, requiring professional diagnosis․
A common culprit is a defective magnetron, the component responsible for generating microwaves․ This necessitates a qualified technician for replacement․ Avoid attempting self-repair of the magnetron due to high-voltage risks․ Ensure no metal objects are inside, as they can cause arcing and prevent heating․
Rotating Plate Malfunction
If the rotating plate stops turning, first ensure it’s correctly seated on the drive coupling inside the microwave․ Obstructions like oversized dishes or food spills can hinder rotation; remove these․ Check the roller guide for damage or debris, cleaning it thoroughly․ A faulty roller motor or drive coupling is often the cause․
Attempting to manually rotate the plate should not be done, as this can damage the mechanism․ If the motor seems unresponsive, it likely requires replacement by a qualified technician․ Ensure the microwave is unplugged before inspecting the internal components․ Consistent, even heating relies on proper plate rotation․
Safety Precautions
Always exercise caution when operating your KitchenAid combination oven․ Never attempt to operate the appliance if the door doesn’t close securely or if seals are damaged․ Avoid heating sealed containers, as they may explode․ Use microwave-safe cookware only; metal objects can cause sparks and fire․ Supervise children closely when the oven is in use․
Regularly inspect the power cord for damage and avoid using extension cords․ Do not immerse the appliance in water or other liquids․ Allow the oven to cool completely before cleaning․ Disconnect power before servicing․ Follow all warnings and instructions detailed in this manual to ensure safe operation․
Warranty Information
Your KitchenAid combination oven is covered by a limited warranty against defects in materials and workmanship․ The standard warranty period is typically one year from the date of original purchase, though extended warranties may be available․ Coverage includes parts and labor for repairs performed by authorized service providers․
This warranty does not cover damage resulting from misuse, accident, improper installation, or unauthorized repairs․ To obtain warranty service, retain your proof of purchase and contact KitchenAid customer support․ Specific warranty details, including exclusions and limitations, are outlined in the separate warranty document included with your appliance․
Accessing Additional Resources & Support
For comprehensive support, visit the official KitchenAid website, where you can download the complete user manual for your specific model․ The website also features frequently asked questions (FAQs), helpful videos demonstrating common tasks, and troubleshooting guides․ If you require direct assistance, KitchenAid’s customer service team is readily available․
You can reach them by phone – (717) 866-7555 – or through online chat support․ Ensure you have your model and serial number handy when contacting support for efficient assistance․ Explore online appliance repair communities and forums for peer-to-peer advice and solutions․
KitchenAid Website and Manual Downloads
The KitchenAid website serves as a central hub for accessing valuable resources related to your combination oven․ You can easily locate and download the complete owner’s manual in PDF format, providing detailed instructions and safety information․ The site offers model-specific documentation, ensuring you have the correct guide for your appliance․
Beyond the manual, explore the support section for troubleshooting tips, parts diagrams, and warranty details․ KitchenAid frequently updates its online resources, so regular checks are recommended․ Registering your appliance on the website unlocks additional benefits, including exclusive offers and product updates․
Customer Service Contact Information
For personalized assistance with your KitchenAid combination oven, several customer service channels are available․ You can reach KitchenAid’s dedicated support team via phone, allowing for immediate troubleshooting and guidance․ Their representatives are equipped to address a wide range of inquiries, from operational questions to repair concerns․
Alternatively, explore the online support portal for live chat options and email submission․ Martin Appliance, a KitchenAid retailer, also provides support at (717) 866-7555․ Ensure you have your model and serial number readily available when contacting support to expedite the assistance process․ Detailed contact information is available on the KitchenAid website․