
Mirro pressure canners offer a safe and reliable method for preserving foods‚ detailed in comprehensive manuals and recipe books. Understanding Mirro’s instructions ensures optimal results.
What is Pressure Canning?
Pressure canning is a high-heat method of preserving food‚ crucial for low-acid vegetables‚ meats‚ and seafood. Unlike water bath canning‚ it reaches temperatures of 240°F (116°C)‚ destroying Clostridium botulinum spores – the cause of botulism.
Mirro canners utilize pressurized steam to achieve this temperature‚ ensuring food safety. Following Mirro’s specific instructions regarding processing times and pressures is paramount for successful and safe preservation. Proper technique prevents spoilage and guarantees long-term storage.
Why Choose a Mirro Pressure Canner?
Mirro pressure canners are renowned for their durability and consistent performance‚ backed by decades of experience. They offer both weighted gauge and dial gauge models‚ catering to diverse preferences; Access to readily available Mirro manuals and recipes simplifies the canning process.
Many users find Mirro models compatible with others‚ like Cooks Essentials 99700. Choosing Mirro means investing in a trusted brand with a strong reputation for safe and reliable food preservation‚ guided by clear instructions.
Understanding Your Mirro Pressure Canner
Familiarizing yourself with your Mirro canner’s components‚ as detailed in the manual‚ is crucial for safe and effective operation and following instructions.
Identifying the Parts
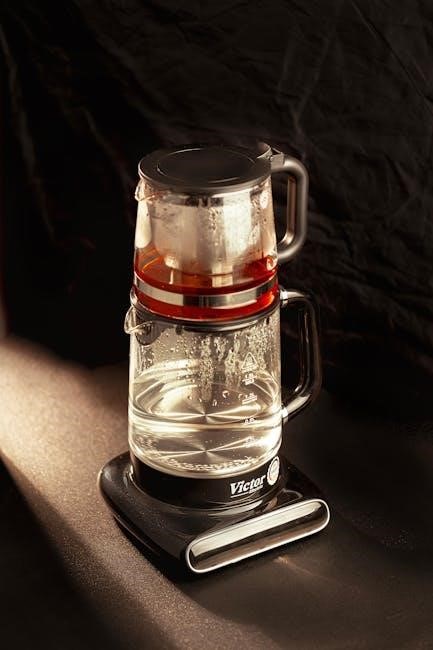
Mirro pressure canners consist of several key components‚ thoroughly explained within the user manual. These include the pot itself‚ a secure-fitting lid with a sealing ring‚ a vent pipe (or petcock)‚ a pressure gauge (weighted or dial)‚ and often‚ a rack for jar placement.
Understanding each part’s function – from the vent pipe regulating steam release to the gauge monitoring internal pressure – is vital. Proper assembly‚ as illustrated in the instructions‚ ensures a safe seal and successful canning process. Always refer to your specific model’s manual for accurate part identification.
Pressure Canner Sizes and Capacities
Mirro pressure canners are available in various sizes‚ typically measured by quart capacity. Common sizes include 8‚ 12‚ 16‚ and 23-quart models‚ as detailed in the manual. Capacity dictates how many jars can be processed at once; the instructions specify maximum jar loads for each size.
Choosing the right size depends on your canning needs and available space. Always adhere to the manual’s guidelines regarding minimum liquid levels and maximum jar numbers to ensure safe and effective pressure canning.
Safety Features of Mirro Canners
Mirro pressure canners incorporate several safety features‚ outlined in the instruction manual. These include locking lid mechanisms preventing opening during pressurization‚ vent pipes and overpressure plugs releasing excess pressure‚ and robust construction ensuring durability.
The manual emphasizes the importance of regularly inspecting these features before each use. Proper functioning of the vent pipe and safety plugs is crucial for preventing accidents. Always follow the instructions for safe operation.
Preparing for Pressure Canning
Mirro manuals stress thorough preparation: gather equipment‚ sterilize jars correctly‚ and prepare food according to tested recipes for safe canning results.
Gathering Necessary Equipment
Mirro pressure canning requires specific tools for safety and success. Essential items include the canner itself‚ canning jars (with lids and bands)‚ a jar lifter‚ a wide-mouth funnel‚ and headspace tools.
You’ll also need a large pot for pre-treating jars‚ and clean cloths for wiping rims. Mirro manuals emphasize using only approved jars and lids designed for canning. Having these readily available streamlines the process‚ ensuring efficient and safe food preservation. Don’t forget a timer!
Jar Preparation: Sterilization and Inspection
Mirro manuals detail crucial jar preparation steps. Before canning‚ thoroughly wash jars in hot‚ soapy water. Sterilize them by boiling for 10 minutes (adjust for altitude). Inspect jars for cracks‚ chips‚ or imperfections – discard any damaged ones.
Lids require a separate hot water soak (do not boil) to soften the sealing compound. Bands should be free of rust. Proper jar and lid preparation is vital for achieving a secure seal and preventing spoilage‚ as outlined in Mirro’s instructions.
Food Preparation Guidelines
Mirro manuals emphasize following tested recipes for safe canning. Prepare food according to recipe instructions – this often involves washing‚ peeling‚ chopping‚ or pre-cooking. For low-acid foods (vegetables‚ meats)‚ precise preparation is critical to eliminate botulism risk.
Pack food into jars‚ leaving the recommended headspace (space between food and lid). Remove air bubbles using a non-metallic utensil. Wipe jar rims clean before applying lids and bands‚ as detailed in Mirro’s guidance for optimal preservation.
Operating Instructions: Weighted Gauge Models
Mirro weighted gauge models utilize a weighted piece to regulate pressure automatically‚ as described in the manual. Venting and monitoring the weight are key steps.
Loading the Canner
Mirro canner loading requires careful attention to detail‚ as outlined in your manual. Place the canning rack inside the canner. Ensure jars are upright and don’t directly touch each other or the canner’s sides.
Fill jars with prepared food‚ leaving the recommended headspace. Wipe jar rims clean before placing lids and rings. Do not overtighten rings; fingertip tight is sufficient. Load filled jars onto the rack‚ ensuring even weight distribution within the canner for safe processing.
Adding Water and Sealing the Lid
Refer to your Mirro canner manual for precise water level guidelines‚ varying by jar size and recipe. Generally‚ add enough hot water to reach the minimum fill line‚ typically 2-3 inches.
Carefully position the lid‚ aligning it correctly with the canner body. Securely fasten the lid‚ ensuring a proper seal. Double-check the gasket is in place and clean. Improper sealing can compromise the canning process and food safety.
Venting the Canner
Before pressurizing‚ Mirro canners require venting to remove air. Leave the vent port (or petcock) open and heat on high until a steady‚ robust stream of steam escapes for 10 full minutes.
This crucial step ensures all air is expelled‚ achieving accurate pressure readings. After venting‚ close the vent port with the weight or pressure regulator as indicated in your manual. Failure to vent properly can lead to inaccurate processing times.
Processing Times for Different Foods
Mirro canner instructions emphasize using tested recipes from reliable sources like the USDA Complete Guide to Home Canning or the National Center for Home Food Preservation.
Processing times vary significantly based on food type (low-acid vs. high-acid)‚ jar size‚ and your altitude. Always consult your manual and recipe for the correct time and pressure. Accurate timing is vital for safe food preservation‚ preventing spoilage and botulism.
Operating Instructions: Dial Gauge Models
Mirro dial gauge models require careful monitoring of the gauge during processing‚ alongside altitude adjustments detailed in the manual for safe canning.
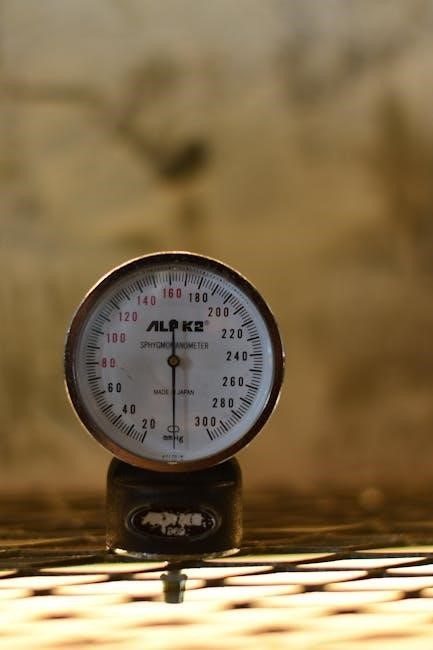
Understanding the Dial Gauge
Mirro dial gauge canners utilize a weighted gauge to indicate internal pressure‚ crucial for safe food preservation. The dial displays pounds per square inch (PSI)‚ requiring precise reading during processing.
Ensure the gauge is clean and unobstructed for accurate readings. Regularly check the manual for specific PSI requirements based on the food being canned and your altitude. A faulty dial gauge necessitates replacement before use‚ as inaccurate readings can lead to under-processing or dangerous over-pressurization.
Adjusting for Altitude
Mirro pressure canning requires altitude adjustments‚ as water boils at lower temperatures at higher elevations. This impacts processing times and required PSI. Consult your Mirro canner’s instruction manual for specific altitude charts.
Increase processing pressure for altitudes above sea level; typically‚ adding 5 PSI is recommended for every 1‚000 feet. Failing to adjust for altitude can result in insufficient heat penetration‚ leading to spoilage and potential health risks. Accurate adjustment is vital for safe preservation.
Monitoring Pressure During Processing
Consistent pressure monitoring is crucial when using a Mirro dial gauge canner. After venting‚ the gauge must reach the recipe’s specified PSI within a reasonable timeframe – usually within a few minutes.
Maintain a steady pressure throughout the entire processing time‚ making small adjustments to the heat source as needed. Fluctuations should be minimized. Refer to your manual for guidance on acceptable pressure ranges and troubleshooting potential issues during the canning process.
Troubleshooting Common Issues
Mirro canner problems‚ like failing to reach pressure or seal‚ are often addressed in the manual; check gaskets and follow instructions carefully.
Canner Won’t Reach Pressure
If your Mirro pressure canner fails to build adequate pressure‚ consult the manual first. Common causes include insufficient liquid‚ a poorly sealed lid‚ or a blocked vent pipe. Ensure proper water levels are used based on the recipe. Verify the sealing ring (gasket) is correctly positioned and in good condition – replace if damaged.
Also‚ confirm the vent pipe isn’t obstructed. A weighted gauge model needs unobstructed steam release; dial gauges require proper venting before pressurization. Always follow the manual’s venting procedure precisely.
Pressure Fluctuations During Canning
Minor pressure fluctuations are normal during pressure canning with a Mirro canner‚ but significant swings require attention. Refer to your manual; these can stem from heat source inconsistencies or lid issues. Ensure a stable heat source – adjust burner settings as needed to maintain consistent pressure.
Check the sealing ring for proper fit and condition. Excessive fluctuations might indicate a faulty gauge (dial gauge models) needing testing or replacement‚ as detailed in the manual.
Jar Sealing Failures
Unsealed jars after pressure canning with a Mirro canner usually indicate issues with jar preparation‚ headspace‚ or processing time. Consult your manual for precise guidelines. Ensure jar rims are clean‚ and lids are new with undamaged sealing compounds.
Proper headspace is crucial; follow recipe recommendations. If failures persist‚ reprocess within 24 hours using new lids‚ or refrigerate/freeze the contents – never reuse unsealed canned goods‚ as per Mirro’s safety instructions.
Specific Food Canning Guidelines
Mirro canning instructions emphasize following tested recipes for low-acid vegetables‚ meats‚ and fruits‚ ensuring safe processing times and proper pressure settings.
Canning Low-Acid Vegetables
Mirro instructions strictly require pressure canning for low-acid vegetables like green beans‚ corn‚ and potatoes to eliminate Clostridium botulinum spores. Always consult tested recipes from the USDA or National Center for Home Food Preservation.
Proper processing times vary based on jar size and vegetable type; adhere to guidelines precisely. Ensure adequate headspace and follow venting procedures detailed in your Mirro manual. Failure to follow these instructions can result in dangerous spoilage.
Canning Meats‚ Poultry‚ and Seafood
Mirro pressure canning instructions emphasize the critical need for pressure canning meats‚ poultry‚ and seafood due to the risk of botulism. Always use approved recipes and processing times from reliable sources like the USDA.
Hot packing—heating the food before jarring—is often recommended. Ensure proper headspace and follow venting procedures meticulously‚ as outlined in your Mirro manual. Precise adherence to these instructions is vital for safe food preservation.
Canning Fruits (with Pressure Canner Considerations)
While Mirro pressure canners are primarily for low-acid foods‚ certain fruit applications exist. Instructions typically advise using a boiling water bath canner for most fruits due to their higher acidity. However‚ pressure canning may be suitable for fruit butters or purees.
Always consult a tested recipe; do not adapt boiling water bath recipes for pressure canning; Following Mirro’s guidelines and USDA recommendations ensures safety and quality. Proper venting and processing times are crucial.
Maintaining Your Mirro Pressure Canner
Mirro instructions emphasize cleaning‚ gasket replacement‚ and dial gauge testing (for applicable models) after each use to ensure continued safe operation.
Cleaning and Inspection After Each Use
Mirro instructions detail a thorough cleaning process post-canning; remove all food residue from the pot and lid. Inspect the sealing gasket for cracks‚ nicks‚ or hardening – replace if damaged. Carefully examine the vent pipe and petcock for blockages‚ ensuring they are clear for proper venting.
Check the pressure gauge (if applicable) for any damage to the glass or mechanism. A clean and well-maintained canner‚ as per the manual‚ is crucial for safe and effective food preservation‚ preventing potential hazards and ensuring long-term usability.
Replacing Gaskets and Seals
Mirro instructions emphasize regular gasket replacement; typically annually‚ or sooner if signs of wear appear. Ensure the new gasket precisely matches your canner model. Carefully remove the old gasket‚ cleaning the rim where it sits; Install the new gasket‚ ensuring a snug and even fit.
Proper sealing is vital for safe canning. Refer to your manual for specific guidance on seal replacement. Damaged or improperly installed seals compromise pressure‚ potentially leading to food spoilage or dangerous situations‚ so follow Mirro’s recommendations diligently.
Testing the Dial Gauge (Dial Gauge Models)
Mirro instructions mandate annual dial gauge testing for accuracy. Use a gauge testing kit‚ available at many hardware stores or through extension offices. Follow the kit’s manual precisely‚ comparing your canner’s reading to the test gauge at multiple pressure points – typically 5‚ 10‚ and 15 PSI.
If discrepancies exceed recommended tolerances‚ replace the dial gauge. An inaccurate gauge can lead to under-processing‚ risking botulism. Consistent testing‚ as outlined in Mirro’s guidelines‚ is crucial for safe food preservation;

Safety Precautions
Mirro instructions emphasize preventing burns‚ avoiding over-pressurization‚ and ensuring proper lid sealing. Always follow the manual for safe canning practices.
Preventing Burns and Scalds
Mirro pressure canning instructions strongly advise caution when handling hot jars and the canner itself. Utilize proper canning tools‚ like jar lifters‚ to safely remove jars.
Always vent the canner properly‚ directing steam away from your face and hands. Avoid touching the lid or any hot surfaces during operation.
Be mindful of escaping steam after processing; allow the canner to cool naturally before attempting to open it‚ following the manual’s guidance to prevent scalding injuries.
Avoiding Over-Pressurization
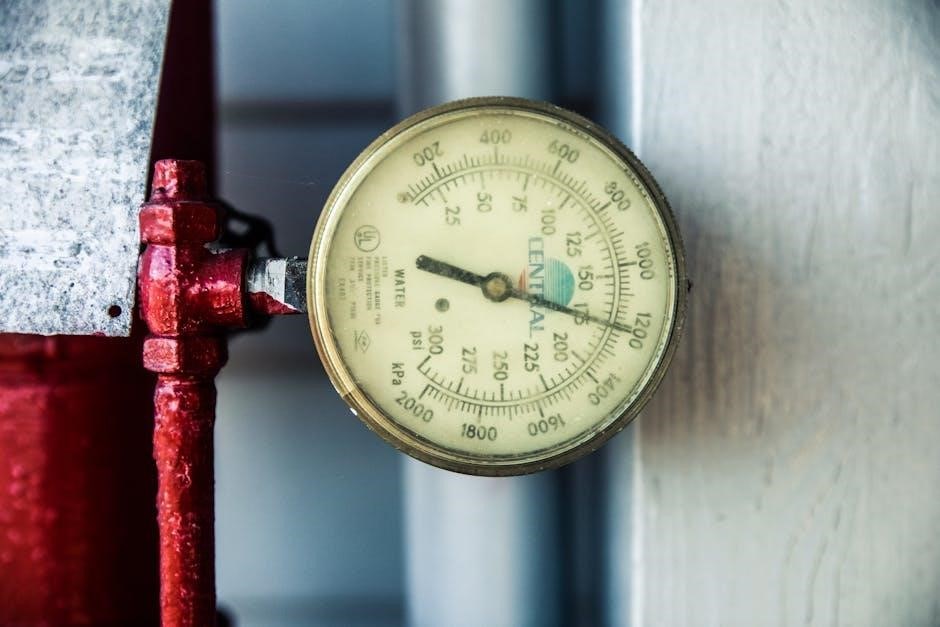
Mirro pressure canner instructions emphasize the importance of maintaining correct pressure during processing. Regularly check the gauge (dial or weighted) and adjust heat to maintain the recommended PSI.
Never exceed the maximum pressure specified for your altitude and food type.
Ensure the vent pipe is clear of obstructions. If the canner consistently over-pressurizes‚ consult the manual or discontinue use until a qualified technician can inspect it‚ prioritizing safety above all else.
Proper Lid Sealing Techniques
Mirro pressure canner instructions detail crucial lid sealing steps. Always inspect the sealing ring for cracks or deformities before each use‚ replacing it when necessary. Ensure the lid is centered correctly on the canner body.
Follow the manual’s guidance for tightening the lid – snug‚ but not overly forced.
Proper venting is key; a steady stream of steam indicates a good seal is forming before pressure builds. A failed seal compromises food safety‚ so follow procedures carefully.
Mirro Canner Model Variations
Mirro offers diverse models‚ including compatibility with Cooks Essentials 99700‚ and comparisons to All American‚ each requiring specific instruction adherence for safe canning.
Cooks Essentials 99700 Compatibility
Many users inquire about the compatibility between Mirro pressure canners and the Cooks Essentials 99700 pressure cooker. While functionally similar‚ direct interchangeability of parts isn’t always guaranteed.
However‚ Mirro’s weighted gauge regulators often fit the Cooks Essentials model‚ offering a replacement option. Always consult both appliance manuals before attempting any part substitution to ensure proper fit and safe operation. Prioritize safety and verify compatibility before use.
All American Canner Comparison
All American canners are known for their durability and lack of a gasket‚ differing from most Mirro models. While Mirro utilizes rubber gaskets requiring periodic replacement‚ All American relies on metal-to-metal seals.
Both brands achieve safe canning‚ but operating procedures differ. Mirro manuals detail gasket maintenance‚ while All American instructions focus on proper tightening of the lid. Understanding these distinctions is crucial for safe and effective food preservation.
Mirro 92012 Specific Instructions
The Mirro 92012 model‚ a popular choice‚ requires careful adherence to its manual. Key steps include ensuring the vent pipe is clear before sealing‚ and achieving the correct pressure for your altitude.
Proper venting is vital – allow steam to exhaust for 10 minutes before adding the weight. Monitor the gauge closely during processing‚ adjusting heat to maintain consistent pressure. Always follow recommended processing times for specific foods detailed within the Mirro 92012 guide.

Resources and Further Information
Mirro pressure canner manuals are readily available online‚ alongside guidance from the National Center for Home Food Preservation and USDA canning resources.
Mirro Pressure Canner Manuals Online
Finding your specific Mirro pressure canner manual is crucial for safe operation. Numerous websites archive older models like the 92012‚ offering downloadable PDF versions of instruction and recipe booklets. These manuals detail proper usage‚ safety precautions‚ and troubleshooting tips.
Resources often include detailed diagrams identifying canner parts and comprehensive processing times for various foods. Always refer to the manual corresponding to your exact model number to ensure accurate and safe canning practices. Digital copies prevent loss and offer convenient access during preparation.
National Center for Home Food Preservation
The National Center for Home Food Preservation (NCHFP) is a vital resource complementing your Mirro pressure canner manual. It provides science-based guidelines for safe food preservation‚ including detailed canning instructions for various foods.
NCHFP offers updated processing times‚ crucial for ensuring adequate heat penetration and preventing botulism. While your Mirro manual is model-specific‚ NCHFP provides general best practices and research-backed recommendations‚ enhancing your canning safety and success. Always cross-reference information for optimal results.
USDA Complete Guide to Home Canning
The USDA Complete Guide to Home Canning is a cornerstone resource for anyone using a Mirro pressure canner. It details safe canning practices‚ covering everything from jar preparation to processing times‚ offering a comprehensive understanding beyond your manual.
This guide provides scientifically-tested recipes and procedures‚ ensuring food safety and quality. It’s essential to consult the USDA guide alongside your Mirro instructions‚ especially when canning low-acid foods‚ to guarantee proper heat processing and prevent spoilage.
Advanced Canning Techniques
Mastering hot packing versus raw packing‚ and precise headspace‚ elevates your Mirro canning. Adjusting recipes ensures safe‚ delicious preservation‚ following manual guidelines.
Hot Packing vs; Raw Packing
Mirro canning manuals detail both hot and raw packing methods. Hot packing involves pre-heating foods before jarring‚ reducing float and improving vacuum seals – ideal for denser produce. Raw packing simply fills jars with fresh‚ unheated food.
Hot packing generally results in better color and flavor retention‚ alongside shorter processing times. However‚ raw packing is quicker for certain foods. Always consult your Mirro guide for specific recommendations based on the food you’re preserving‚ ensuring safety and quality.
Headspace Considerations
Mirro pressure canning manuals emphasize the importance of proper headspace – the empty space between the food and the jar lid. Recommended headspace varies by food type; typically ¼ inch for low-acid vegetables‚ and ½ inch for fruits and pickles.
Insufficient headspace can cause jar sealing failures due to food expansion during processing. Excessive headspace may prevent a proper vacuum. Always adhere to Mirro’s specified headspace guidelines for each recipe to guarantee safe and effective preservation‚ as detailed in your instruction booklet.
Adjusting Recipes for Pressure Canning
Mirro pressure canner manuals advise against directly converting boiling water bath recipes for pressure canning‚ especially for low-acid foods. Adjustments are crucial for safety. Always use recipes specifically formulated for pressure canning‚ ensuring correct processing times and pressures.
When adapting a recipe‚ prioritize acidity levels and processing parameters. Reduce sugar or increase acidity with lemon juice if needed. Refer to the Mirro guide or USDA recommendations for safe adjustments‚ guaranteeing proper heat penetration and botulism prevention.